Content Module
Introduction
The Content module is designed to help you view and manage content from multiple data sources seamlessly.
Whether your data is returned via REST connectors or MUA connectors, the module provides an organized, unified view of your content.
It displays data in a tree-table format, making it easy to browse, search, and manage.
Notice
This module is designed to work fully with data stored in the internal PubServer database.
When content is retrieved from an external data source via a REST connector, it is available for viewing only.
Actions such as Add, Edit, or Delete are not supported for this type of data.
The Advanced Search feature may work with external data only if the connected REST service has been properly configured to support the required search endpoints. Otherwise, search filters will not apply to that data.
To ensure full functionality, use the internal PubServer database when managing or editing content.
Key Components of the Content Module
Before you start using the Content module, let’s quickly review the key components that simplify content management within this application:
- Tree-table view: Provides a clear, organized structure for your content. You can easily expand or collapse categories to find the content you need quickly.
- Search function: Offers two options:
- Advanced search for filtering content from the internal PubServer database using multiple criteria.
- Instant search for real-time filtering by labels or identifiers across both internal and external data sources at the first level.
- Layout design: Logical and well-structured with proper spacing and alignment, allowing smooth content management.
- Feedback and Notifications: All content actions (create, edit, delete) trigger a Toast message confirming success or failure.
Accessing the Content Module
To open and use the Content module, you must have the appropriate access permissions.
These permissions are assigned by your system administrator.
Before you begin, ensure that the Data Management (DM) application is installed on the publication server.
Once installed, the Content module becomes visible in your interface based on your assigned access rights.
Checkpoint
- The visibility of the Content module depends on the roles defined in your system.
- Access rights are managed through the priint:admin group.
- The relevant role for the Content module is currently available in both the priint:admin and DM Application groups.
- Refer to the Role Definition section for instructions on where and how to assign the appropriate role.
Steps to Access the Content Module in Data Management
- Open the Data Management application.
- Locate Content in the navigation panel and click on it.
- You'll see your content displayed in a tree-table format, allowing you to browse structured content easily.
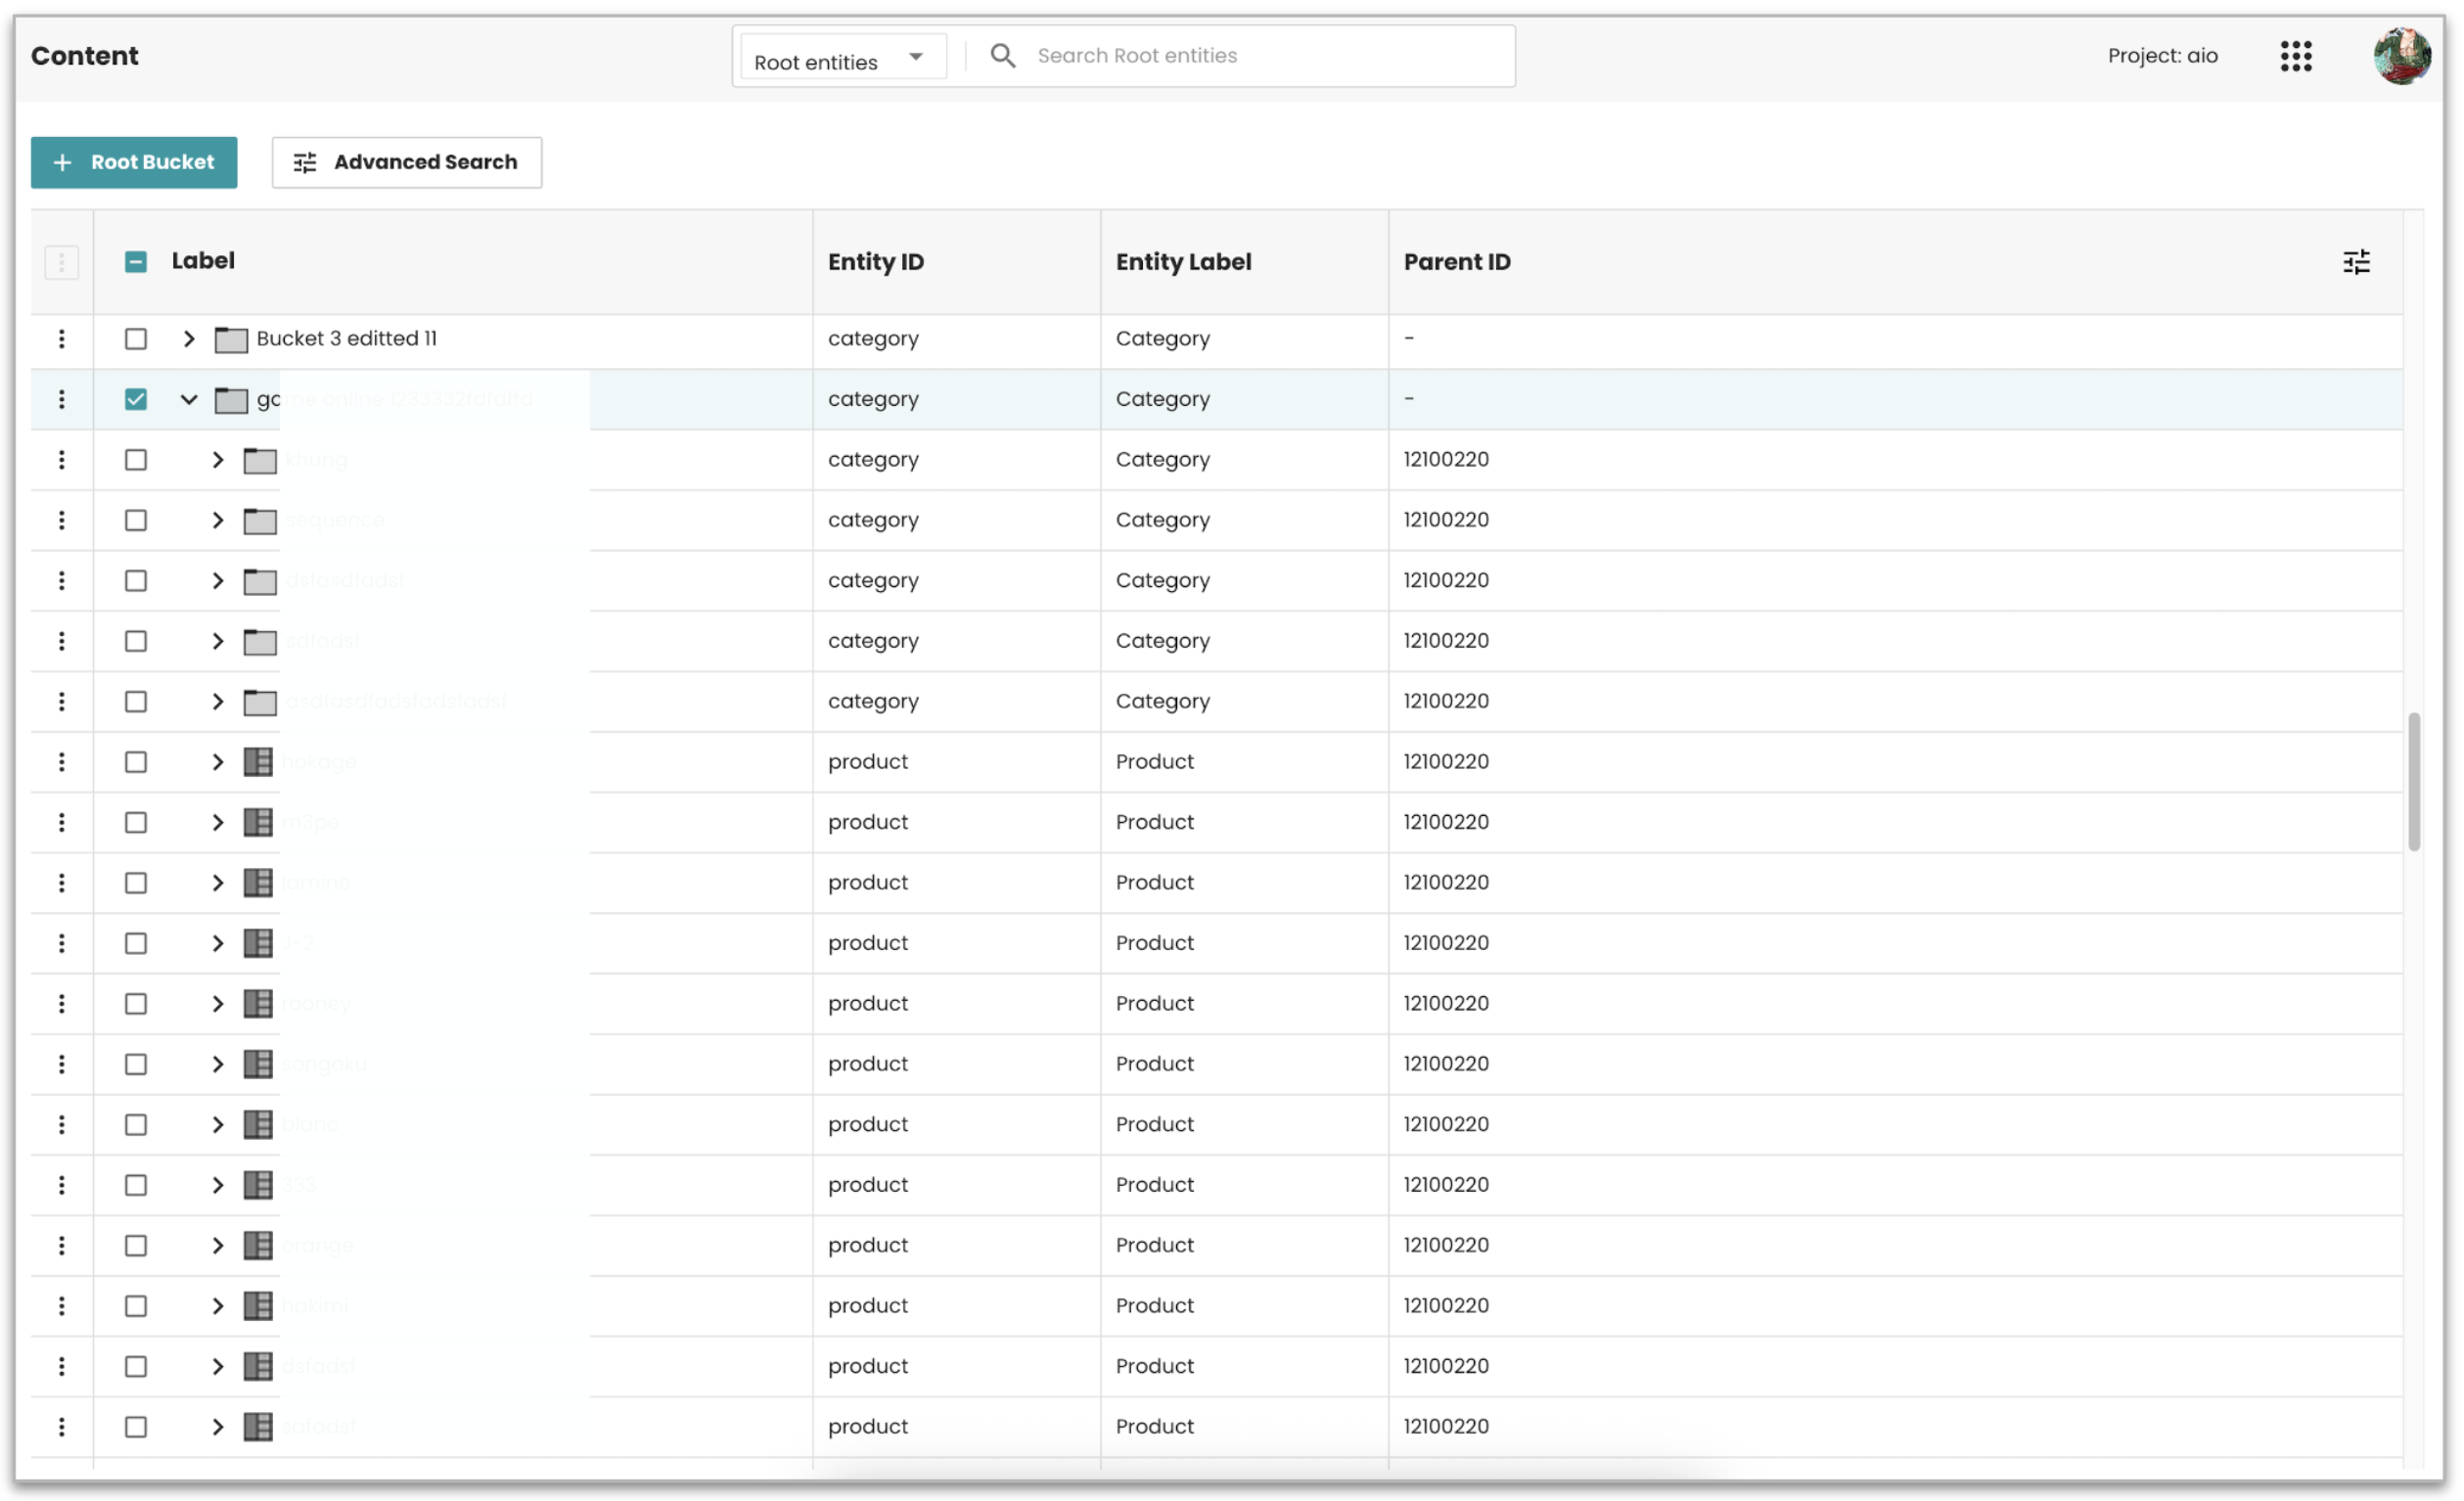
Viewing Content Data in Tree-Table Mode
The tree-table is the main feature of the Content module. It allows you to view content in a well-organized and intuitive way.
This view combines the tree view and a table, where the following columns are displayed by default:
Label, Entity ID, Entity Label, and Parent ID.
Expanding and Collapsing Items
- To view sub-items under a category, click the > (expand arrow) icon next to it.
- To collapse and hide sub-items, click the V (forward arrow) icon.
Adding More Columns to the Tree-Table
The Add More Columns icon allows you to customize the content displayed in the tree-table.
By clicking on this icon, a list of available attributes for the viewing content will appear.
How to Add More Columns:
- Click the Add More Columns icon.
- A list of available attributes will appear in two tabs, including options like Label, Identifier, Entity ID, Entity Label, Template, and Page Template.
- Check the boxes next to the attributes you want to display in the tree-table.
- The selected columns will appear in the tree-table for your current view.
Applying Changes:
Any changes made (such as selecting additional columns) are saved locally, meaning they will persist across sessions as long as you’re using the same browser.
This functionality provides a flexible and user-friendly way to tailor the content display to your preferences.
Sorting by Label
You can sort the content in the tree-table by clicking the Sort icon next to the Label column.
This sorting functionality applies from parent to child items of the tree-table and follows alphabetical order, allowing you to quickly arrange content for easier navigation and management.
Viewing Data of Content Entities
When you select an item from the tree-table, the right panel will display important details such as:
- Buckets: Grouped content items
- Media Assets: Images, videos, and other media files
- Text
- Key Values
- Links
- Content Metadata (CMD)
- Other relevant details associated with the selected item
Managing Buckets
Buckets help you organize and structure your content. You can create, edit, or delete buckets directly from the content list using the available menu options.
Creating a Root Bucket
- Click the + Root Bucket button in the top-left corner of the screen.
- A dialog will open where you can enter details such as the Bucket Label and other required fields.
- Click Create to add the new root bucket.
Creating a New Bucket at Any Level
- In the tree view or right panel, select the bucket where you want to create a new one.
- Check the box next to the selected item.
- Click the three-dot menu (⁝) next to it.
- From the context menu, choose + Create Item.
- Enter the Bucket Label and required fields.
- Click Create to finalize and add the new bucket.
Duplicating a Bucket
How to duplicate a bucket:
- Select the bucket you want to duplicate.
- Open the context menu (⁝) next to the item.
- Click the Duplicate icon.
What happens next:
- A new bucket is created at the same level as the selected one.
- The “Updated On” date for the duplicated bucket is set to the current date and time.
- The page reloads automatically, and the duplicated bucket is displayed with selection applied.
Edit an Existing Bucket
- Select the checkbox next to the bucket you want to edit.
- Click the three-dot menu (⁝) next to the selected item.
- From the context menu, click Edit item.
- The right panel will open, allowing you to update the bucket details.
- Click Save to apply changes.
Delete a Bucket
- Select the checkbox next to the bucket you want to delete.
- Click the three-dot menu (⁝) next to the selected item.
- From the context menu, click Delete item.
- A popup will ask for confirmation.
- Once confirmed, the selected bucket will be removed.
If the deleted bucket had a parent item, the parent will be automatically selected and its details loaded in the right panel.
If it was a root item, the right panel will close.
Single Selection
How it works: Click any row in the list to select a single bucket and view its details.
Available Actions:
- Click the three-dot menu (⁝) next to the selected item.
- Or click the same menu icon on any child item in the right panel (if available).
System Behavior: The system captures the ID of the selected bucket and passes it to the dialog to trigger the chosen action.
Bulk Selection
How it works: Select multiple buckets by checking the boxes next to the items you want.
Available Actions:
- Use the three-dot menu (⁝) in the top-left header of the tree-table.
- Select from the available bulk actions.
System Behavior: The system captures the IDs of all selected items and processes them according to the chosen action.
Managing Content Entities
You can create, edit, or delete content entities directly from the content list using the available options in the context menu.
Create a New Content Entity
- Select the + Create icon in the top right.
- A dialog will open where you can enter details.
- After entering the information, click Create to add the entity.
Edit an Existing Content Entity
- Select the checkbox next to the content entity you want to edit.
- Click the three-dot menu (⁝) next to the selected item.
- Choose Edit item.
- The right panel will open where you can update details.
- Click Save to apply the updates.
Delete a Content Entity
- Click the three-dot menu (⁝) next to the selected item.
- Choose Delete item.
- Confirm deletion in the dialog.
- The entity will be removed from the system.
Uploading Multiple Images
When creating a new media asset, you can upload multiple images at once.
Automatic Labeling
- The system automatically uses each image’s filename as its label.
- The label field is hidden during upload.
- Labels become visible only when editing image details.
Upload Screen Behavior
Create Screen
- The Upload option is preselected by default.
- Entity selection:
- If only one entity exists → automatically selected.
- If multiple entities exist → dropdown appears without a default selection.
Edit Screen
- The Type field has two options: File or Path.
- The Upload option changes to File, with the ability to switch to Path if needed.
Handling Duplicate Image Filenames
- The system prevents file overwrites by managing duplicates automatically.
- If a filename already exists, a sequential number is added before the extension.
Example:
image.jpg → if duplicate exists → renamed to image_1.jpg, image_2.jpg, etc.
The system assigns the next available number automatically.
Content Metadata (CMD)
The CMD section allows you to manage content metadata directly within the Content module.
Accessing CMD
- CMD for buckets: When selecting a bucket (e.g., Product, Category, Bucket), the CMD tab appears.
- Inline CMD for attributes: When selecting an inline attribute (e.g., Key Value, Text), its CMD appears in the same section.

Managing CMD
Viewing CMD: CMD appears in a tree view. Expandable items are marked with an arrow icon.
Add New CMD:
- Select a CMD item and click the plus icon.
- Each CMD value has:
- ID
- Value
- Sequence (auto-generated)
Edit CMD
- Click the CMD value → unlock using the clock icon.
- Update ID and Value (Sequence remains fixed).
Delete CMD
- Click the item → remove icon → confirm deletion.
Sorting CMD
- Drag and drop to reorder CMD items.
- The UI updates dynamically as you interact.
Saving Changes
- Changes are saved automatically when leaving the cell.
- A toast message confirms success: “Changes Saved!”
Note: CMD appears only if the selected entity or attribute has CMD configured in the Entity model settings.
Advanced Search
The Advanced Search feature allows you to filter and locate content efficiently using multiple criteria.
Accessing Advanced Search
- The Advanced Search button is at the top of the Content module.
- Click to open the search panel.
Search Criteria and Options
- When opened, a dropdown displays available search criteria.
- The first option (e.g., Default search) is selected by default.
- Options depend on admin configuration and may include filters for entity types, metadata fields, etc.

Applying Search Criteria
- Select one or more criteria.
- Enter the filter values.
- Click Search to execute.
- If no match found → “No data found.” appears.
Clearing and Resetting Search
- Click Clear All to remove filters.
- Click Reset to restore the default view.
Viewing Search Results
Filtered results appear in a list view showing only matching items.
Closing the Search Panel
Click the Close icon in the top-right corner to close the search panel.
Your selected search criteria are captured and shown as a snapshot.
Admin Configuration
Admins can configure available search criteria (add, edit, delete, set defaults).
Important Notes on Data Sources
- Advanced Search supports data from the internal PubServer database.
- For external REST connectors:
- If the external system exposes compatible endpoints → searches may work.
- If not → Advanced Search filters will not apply.
Admins should verify whether external connectors support Advanced Search operations.
If not, external data will remain visible but unfilterable via the panel.
Instant Search
The Instant Search feature allows quick, dynamic filtering by labels or identifiers.
Accessing Instant Search
The Instant Search bar is at the top of the Content page beside the entity selection dropdown.
Performing an Instant Search
- Without entity selection: Searches across all available entities at the first level of the tree-table.
- With entity selection: Searches the selected entity only at the first level.
Search Behavior
- As you type, results update dynamically.
- Matching results appear in a list view below the search bar.
- If no results match → “No data found.”