Configuration of Gitlab
Log in to the Gitlab portal, go to your account Preferences, and there to Application registrations:
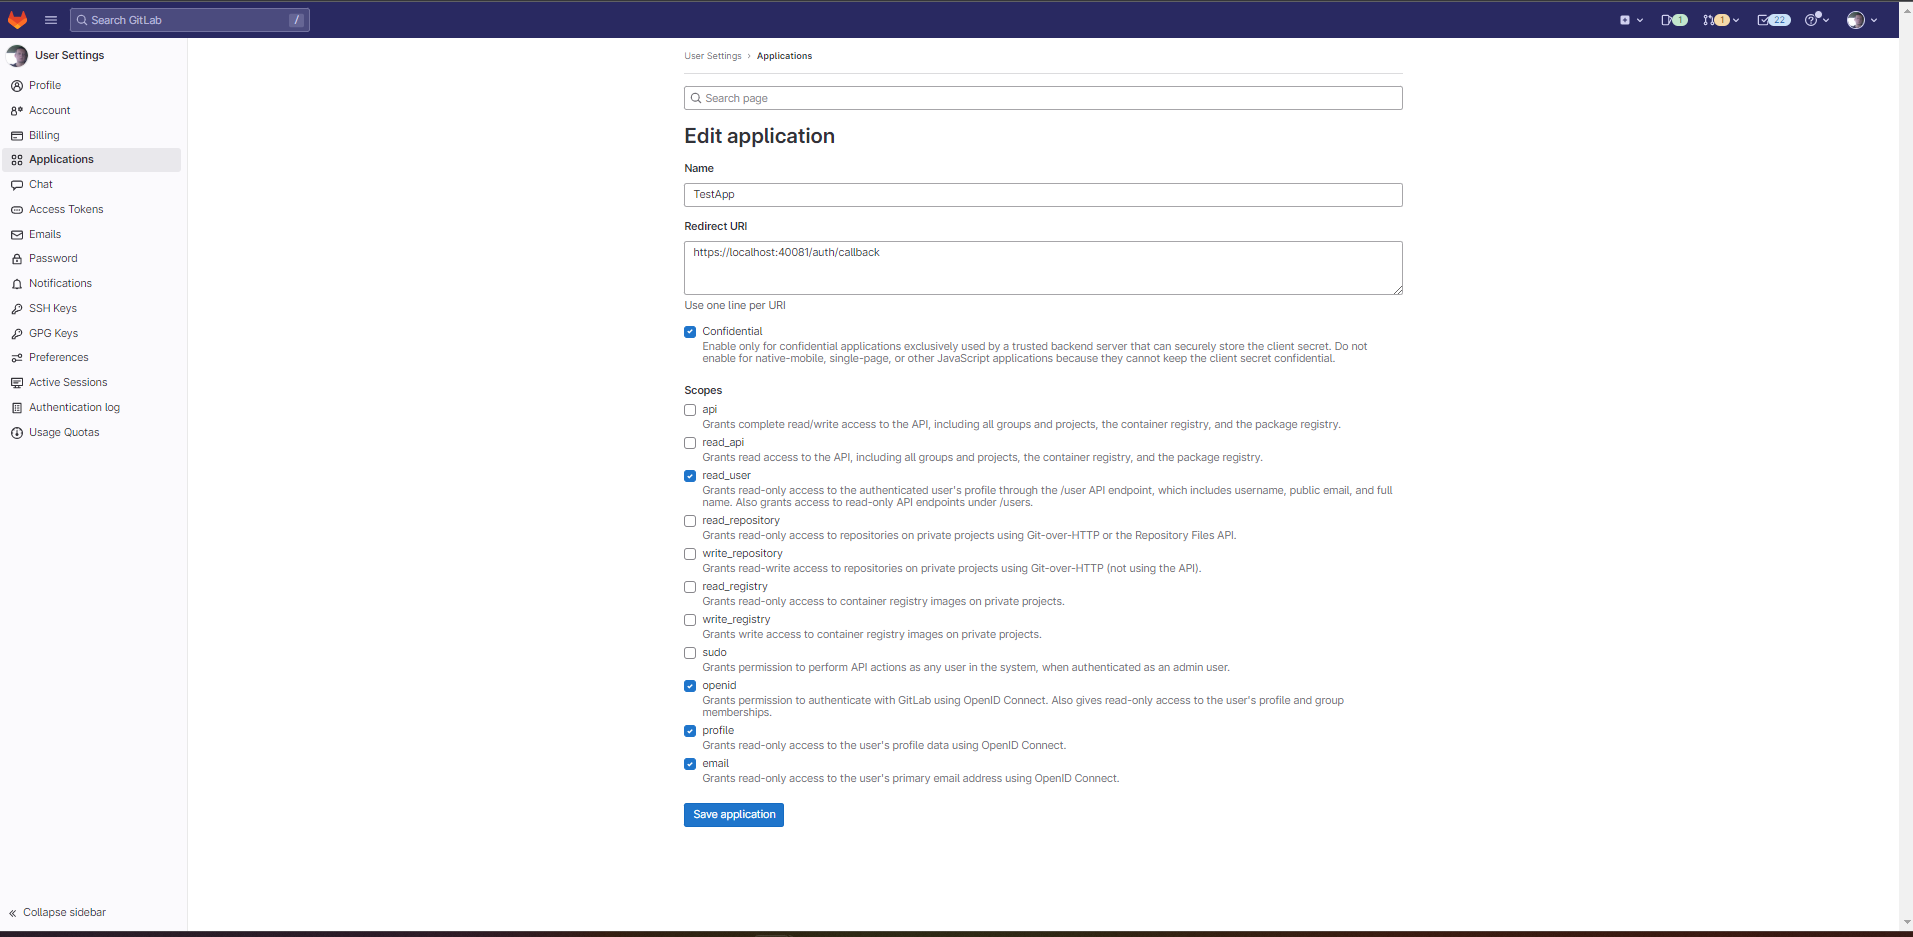
Click "Save application". You should see following screen:
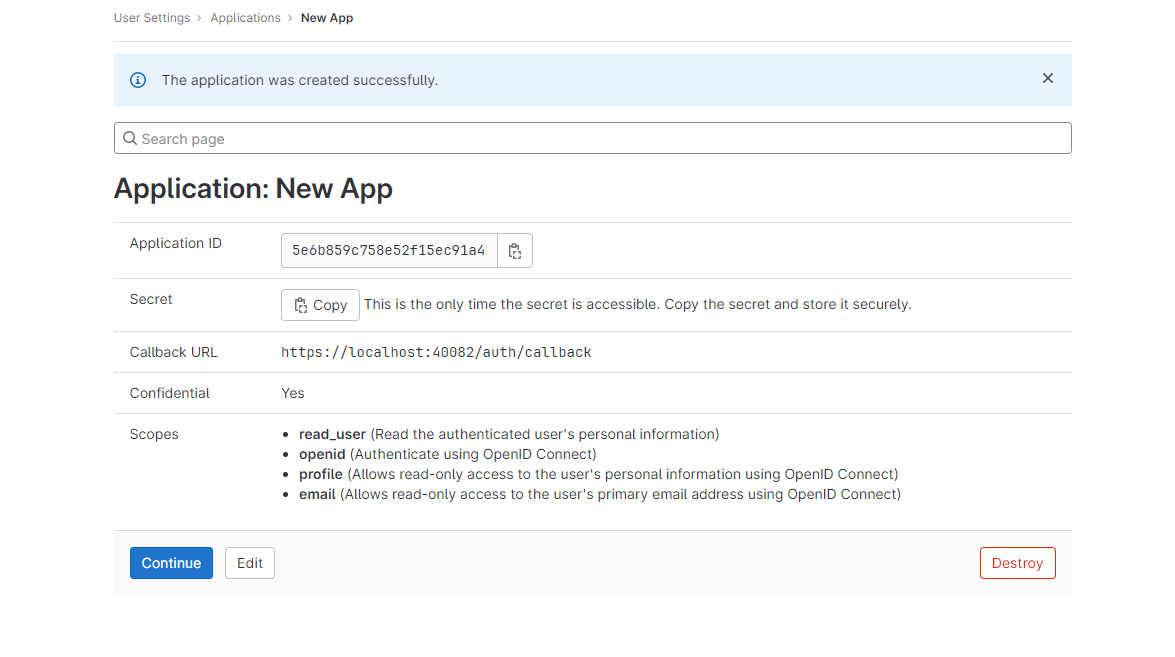 You should copy necessary information from the screen like
application id and secret. And click "Continue" to finish configuration.
You should copy necessary information from the screen like
application id and secret. And click "Continue" to finish configuration.
AuthService configuration
To configure AuthService you need to take following steps:
a) stop Pubserver
b) edit {your_pub_server_root_folder}\glassfish\payara6\glassfish\domains\pubserver\config\AuthService\config.xml file
and add a new entry into the realms section. Please adjust the specific mappings and dynamic rules according to your project needs.
<realm name="gitlab">
    <type>org.pac4j.oidc.config.OidcConfiguration</type>
    <discoveryURI>https://gitlab.com/.well-known/openid-configuration</discoveryURI>
    <clientId>your_client_id_here</clientId>
    <secret>your_secret_here</secret>
    <membershipAttribute>groups_direct</membershipAttribute>
    <membershipMapping>priint-dev:All Rights</membershipMapping>
    <defaultDataset>DefaultProject</defaultDataset>
    <membershipTeamsMapping>priint-dev:TestTeam</membershipTeamsMapping>
    <defaultTeam>TestTeam</defaultTeam>
</realm>
discoveryURI - this URI should be changed according to your installation, for example host/ip, port, realm name (here AuthService) clientId - name of the client you created secret - you can copy it from Client detail's "Credential" tab
c) start pubserver
You can read more about AuthService configuration here: AuthService Configuration